Monday, October 31, 2016

Mistletoe Monday #38-2016

Boo- it's Halloween!

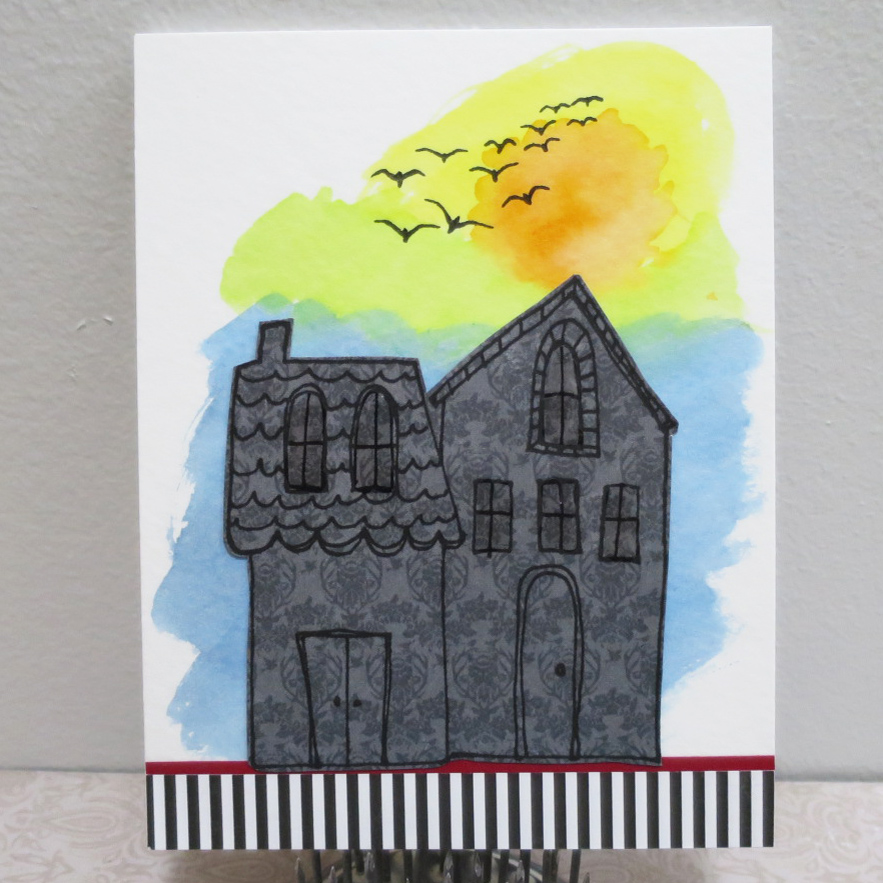
Here is Kim with this adorable card.


This card starts with a very old Inky Antics stamp, Trick or Treat Buddies.  The image actually has a flat bottom, but I stamped it a second time and cut out the trim to create a full circle.  I colored the image with Stampin' Up markers and used a bit of Crystal Effects on the clown nose.  I built the card around it with traditional Halloween colors on a base of black.  I embossed the purple with the Spiderweb embossing folder.  The orange at the bottom was embossed with a really old Fiskars letter press.  Across the bottom I ran some adorable pumpkin ribbon over black satin ribbon. I got them both at A. C. Moore.  

Inside, I used a sentiment I thought paired well with the image.  

I love making Halloween cards.  What about you?  Kim from Katydid Cards

As a bonus here are four from Denise
I don’t typically do Halloween cards, but since both of my children live several states away and I have a brand-new daughter-in-law along with a brand-new 7 year-old granddaughter, I thought it would be fun to send them all a card. The all use papers from Authentique's Halloween Essentials paper pad and solid cardstock.

The first is a step card using items cut from the following Cricut cartridges – A Child’s Year, Monster Bash, Creativebug, and Ornamental Iron.  I used an image cut from one of the papers of the collection and wrote the sentiment. 


The next card was made using a witch from Theresa Collins Chic & Scary cartridge on the Explore.  I went over the black with Wink of Stella to give it a little glimmer.  I mounted it over paper from the Authentique pack.  The sentiment was printed on my printer and fits here perfectly because she does drive a standard transmission car I accented with a little raffia ribbon.  The stamp on the inside is from Studio G. 


I made this card using a great image from another page of the pack and put some Wink of Stella on just the orange of the outfit.  I get most of my ideas from Pinterest and thought this was perfect for my daughter-in-law since she really likes her coffee.  The inside stamp is from Club Scrap, a set called Coffee Break. 


The final card is made by cutting out a bottle shape in black cardstock and vellum on the Explore using the cartridge Country Fair.  I manipulated the size a little to make it a slightly wider proportion than the original.  I then stamped the velum with Versamark using a stamp set by Unity Stamp Company called Boo-leive and used a bright white fine embossing powder heat setting it from the back.  I had to do it a few times because even though I was using an embossing buddy the velum wanted to really hold on to stray powder, maybe because I stamped the Boo so many times. I backed the velum with black so that it would show up before mounting it on the card.  The inside was stamped with the same stamp set and embossed with the same white embossing powder.  Both sentiments were printed on my computer printer.  I love puns, but am not very good at coming up with them, so I love Pinterest and Google searches. - Denise  


Sunday, October 30, 2016

Clean and Simple Sunday #38-2016

Clean and Simple is our Sunday motto.  To create a monochromatic card in tan, white or cream has been a month-long challenge and we end the month with Kim our guest designer all week long -


It's the details.

And a great inside.

This was the second card I made for this particular challenge.  Did you ever make a card that was going to be so great in your mind, but it didn't quite translate into great in reality.  It didn't make the cut...it made the trash.  This card may not look clean and simple, but it really did go together easily.  I used several unrelated cut files I purchased in the Silhouette store to combine for this monochromatic bridal shower card.  

To make the background, I used a stitched heart card file.  I took only the heart and reduced it in size to fit two across and three down.  I cut the umbrella base and then cut the individual pieces and popped them.  I cut flowers and leaves, randomly sized, and just played with the placement of them until I was happy with the look.  The final touch was the addition of pearls in three sizes to suit the flowers.

I think any bride to be would love this card.  I hope you liked it!  Kim 

Kim has a great blog katydidcards.com so check it out.-
Denise

Saturday, October 29, 2016

Inspiration Saturday #37-2016

Are you inspired by this photo?

Sue was certainly inspired here -


I was inspred by the squares and rectangles in the photo. I used a stencil by iStencil – 27-00079 R SC and inktense coloured pencils with a water brush. I traced around the edges of the squares and rectangles with the coloured pencils and with the water brush, I moved the colour around. When I needed more colour, I touched the water brush to the tip of the inktense pencil. The sentiment is die cut from Simon Says STAMP thanks die. I also cut a piece of fun foam with the same die to add dimension to the sentiment.- Sue

Thanks for the great week Sue.  Starting tomorrow we have a bonus 5th week with a designer we haven't seen for awhile, so tune in to see who it is.-
Denise


Friday, October 28, 2016

C.A.S.E A Card Friday #37-2016

How do you C.A.S.E. a card?  You look at an example and then Copy And Steal Everything.  Really you use the card as an inspiration to make your own version of it.

Today Sue took this card...

and turned it to this -


I started with the two houses from Claudine Hellmuth’s dwelling stamp set, stamped on printed paper. I carefully fussy cut out the houses and added crystal effects to the window for a bit of shine. For the background, I started with watercolor paper and added distress inks (mustard seed, spiced marmalade, twisted citron and broken china) for the background. The birds are by Lavinia Stamps – birds. I used scraps of a black and white striped paper and a thin red strip to complete the card. - Sue

I love the way she stamped on patterned paper to create the house.

I also have a bonus card today because I totally missed that Sue had a card that should have gone into our Family Memories Blog Hop last Saturday.  It is such a great card, that I am sharing it here-


So, this is a bit of a stretch – how to make a card with the theme of family history. I’m of Japanese descent – you know, the land of the rising sun. So that was my inspiration, a sunrise, with the silhouette of grasses and dragonflies. I inked up a piece of cardstock to mimic a sunrise with distress inks (mustard seed, spiced marmalade, picked raspberry, dusty concord) and then die cut with a circle die. The silhouettes are stamped from Technique Tuesday’s Wildflower stamp set. The sentiment is from Simon Says STAMP Lots of Thanks stamp set. - Sue

It is a wonderful interpretation of her family history.  Join us tomorrow for a surprise inspiration. -
Denise


Thursday, October 27, 2016

Technique Thursday #37-2016

Our recurring challenge for Thursdays this month is a faux metal technique.  

This is the card Sue created- 


I love the effect achieved with this technique. I masked off the edges of the panel with post-it tape. I inked up the centre of the panel with distress inks (twisted citron, peacock feathers and faded jeans). I then immediately brushed on Perfect Pearls to add shimmer with a paint brush. I removed the post-it tape. I used We R Memory Keepers Geometric embossing folder to add the dimension. The sentiment is die cut using Simon Says STAMP thanks die from a piece of shiny gold paper. - Sue

I agree that this can be a very striking technique as shown on Sue's card, so try it today.
- Denise


Wednesday, October 26, 2016

Card Sketch Wednesday #37-2016

Today's sketch is a great one.


Sue used it as a great springboard to this card - 


When working on this card, I still had my supplies out from my Clean & Simple Sunday card. I used the same embossing folder, the Design Objectives docraft’s small polka hearts 6x6 embossing folder. I also used the Memory Box cherub hearts to die cut the three hearts. For the sentiment heart, I inked up a scrap of cardstock with distress inks (ripe persimmon and picked raspberry) before die cutting. The sentiment is from Simon Says STAMP Thanks stamp set. To balance the shimmer and sparkle, I added Wink of Stella to the pink flag banner.- Sue

See what you can do with this sketch today.
- Denise


Tuesday, October 25, 2016

Color Challenge Tuesday #37-2016

This Tuesday color challenge combines warm reds and cool gray.


Let's see what Sue did.


The colors of this challenge reminded me of autumn. I started by masking off a 1 3/4” strip for inking with post-it tape. Using Stampin’ Up’s French Foliage stamp set and Stampin Up inks – More Mustard, Real Red, Cherry Cobbler and Early Espresso, I created the panel. To add a bit more of a distressed look, I inked the edge with Prima Fluid Chalk ink in dark bark. The sentiment is from Simon Says STAMP Lots of Thanks.- Sue

The use of white space with the beautiful colors on the side really make a great statement with this card.  Nice job Sue.
-Denise


Monday, October 24, 2016

Mistletoe Monday #37-2016

Since Halloween is in one week we will celebrate a little early- 


How does one make a Halloween card when one doesn’t own any Halloween-type stamps or paper? Yep, back to Pinterest for inspiration. I tore pieces of cream cardstock, roughly an inch or so in width. I then inked the torn edges with Prima Fluid Chalk ink – dark bark. I made two “eyes” using a 3/4” punch and a 5/16” punch – thought the eyeballs should be blood-shot, so used a red marker to make squiggly lines. I needed to add a scrap of black cardstock behind the eye placement to make the eyes “pop”. For the sentiment, I used a stencil from Tim Holtz’s Mini Stencil Set 3.

I love this card and also love that Sue proved you don't need special tools or stamps to create a darling card.  You only need imagination (or Pinterest) to make something special. - Denise

Sunday, October 23, 2016

Clean and Simple Sunday #37-2016

Our Clean & Simple challenge continues with monochromatic cards in white, cream or tan.

Sue used various white elements to create this lovely card.


A detailed look

I admit that I had to go to Pinterest to look for inspiration for a monochromatic card in white, cream or tan. I decided to create a wedding card in white – it seemed appropriate. I started with two hearts that were die cut from a piece of shimmer and a piece of sparkle paper using Memory Box’s Cherub Hearts dies. The background was made with Design Objectives docrafts’ small polka hearts 6x6 embossing folder. I found a piece of sparkly white ribbon to complete the card. I didn’t want to mess with the monochromatic card by stamping a sentiment, so it remains with no sentiment.- Sue

A lot of our cards for this challenge have been wedding cards which seem to be a natural fit, so consider doing this for the next wedding card you create. - Denise


Saturday, October 22, 2016

Inspiration Saturday #36-2016

If you are looking for the Exploring Family History Blog - click here.

Our inspiration today is this picture of colorful feathers-


The inspiration led me to this-


At first I tried to dye some actual feathers that I find on my morning walks with the dog, but I couldn't get them to look right.  I tried water colors and alcohol inks, but they would dry so that the feather clumped and I didn't have the patience to keep at it.  Instead I stamped a feather from the Local King Rubber Stamp company set called Feather Pleasures on two pieces of velum.  The first using black ink and the second using Versamark followed by gold embossing powder.  After heat setting that I tore the edges of the velum and distressed them with Walnut Distress Ink. I mounted those with the black on the bottom the embossed piece on top onto some craft paper.  I put some wood-grained washi tape on the side and mounted that on a green card base.  The sentiment is from a set called Remembering With You, but I don't know the manufacturer.  I cut it out freehand so that it would fit within the space. - Denise 


Friday, October 21, 2016

Family History Blog Hop


Welcome to the Exploring Family History blog hop.  We are creating crafts related to our family history.  Most of us would agree when began paper crafting to create a historical record of our and for our families.  Of course, we love to get inky and sticky while doing it so let's dig into our crafty family history projects.


But first, we would like to say a HUGE THANKS to our sponsor today.

http://www.stampinup.net/esuite/home/scrapsbygracie/

Theresa is giving away a $20 Stampin' Up Gift Certificate to one lucky winner AND
take 10% off any order placed through her (not available on website) by October 31th. 
Email her at scrapsbygracie@gmail.com with your order. 

All you have to do to win this fabulous prize is comment on each of the blogs.
That's it! It really is easy.  
Of course, we would love it if you became a follower too. 

Comment buttons can be found at the bottom of the post (on most of the blogs).
Now on with the hop!

First Denise has a project using slate -
I made this a couple of years ago using slate that came from the roof of the house in the picture.  It is a picture of my husband's great grandparents and their four sons in front of their house which was just a few years old at the time.  The parents were tragically killed in a horse & buggy/train accident in 1900;  We currently live in the house and when we had to put a new roof on, I saved all the slates that I could and later made several of these for family.  The picture was scanned into a printer and printed off with a laser printer.  I tore around the image and then soaked that for a few minutes in water.  This was put it on the slate with Mod Podge.  I used a gold vinyl for the letters and cut them on my Expression (since I didn't have my Explore then).  There were several thin layers of Mod Podge on top of everything to protect it, but they are all hanging in protected spaces and not outside. It isn't shown in this picture, but I put a leather strip through the nail holes in the slate and knotted the ends to be able to hang them.

Gracie has preserved some family history this way -


I have been trying to scrapbook my husband's baby and early childhood pictures. He is now 61.  I never had any of his pictures until his mother passed away.  My children and grandchildren are going to love this.  He was born in the same hospital were Elvis Presley was pronounced dead.  I have the receipt for his mother's hospital stay - it cost all of $92.65 in 1955! ~ Gracie  

Kim has a beautiful layout below -


For this project, I created a scrapbook page/home decor piece.  The photo is the only photo I have of my father with his mother.  It was taken in Bangor, Maine in 1940, shortly after my father was born.  The substrate is a Tim Holtz District Market burlap canvas panel that included a pre-printed background.  I applied embossing paste through a 12x12 stencil and left it to air dry.  I sprayed over the area with Lindy Stamp Gang Sprays in neutral colors.  The shimmer in real life is fantastic.  I decorated the canvas in layers with patterned paper and embellishments.  -Kim

Finally Denise finishes up with a scrapbook layout -


This is a picture of my grandmother during her first year of teaching.  She taught in a one-room school in St. Clara, WV in the 1930's.  During that time teachers were not allowed to be married, so she and my grandfather eloped in Maryland and didn't tell anyone they were married for over a year while she continued to teach.  She taught in WV, MI, and OH and earned her master's degree.  She retired in 1977 as a guidance counselor and continued to teach in other ways after that.  I used some papers from a pad of 8 x 8 papers by Tim Holtz called Collage since it had some great old school type images in it. I also distressed the edges of the background paper with Distress Ink.- Denise

Your next stop is Theresa http://scrapsbygracie.blogspot.com/

Below is the full list in case you get lost -

C.A.S.E A Card Friday #36-2016

The challenge - C.A.S.E. this card -


Here is my interpretation of this card- 


I don't usually put a lot of patterns together, but liked that part of the original card, so I embraced it using different Halloween papers from Authentique.   I used a 6 x 6 pad called Moonlit and a 12 x 12 pad called Halloween Essentials. Instead of leaves, I did pumpkins and switched the side of the design.  I cut the pumpkins on my Explore using the images from the cartridges Autumn Celebrations and Pooh & Friends.  On the single pumpkins on the left and top, I changed them up a bit so that one was taller and thinner and the other was shorter and wider.  I popped the middle pumpkins on foam dots and put the left pumpkin on a double thickness of foam so that it was even higher.  The stamp is from Unity Stamp Company and while I didn't get it as straight as I would like, I think it works.  I put it all on a mottled gray cardstock and put that on a black card base that opens from the bottom. - Denise

Try playing around with cutting some of your shapes out of various patterns to mix things up.


Thursday, October 20, 2016

Technique Thursday #36-2016

Our continuing Thursday challenge for October is the technique which looks like faux textured metal.  One of the methods to do this can be found here.


I made this card for a man in our church who can appreciate the humor.  On the inside it says "Remember you are a classic, but not yet an antique."  The metal parts of this card were made by cutting strips 1' wide and 4' long and running those strips through my Cuttlebug using a folder by Lifestyle Crafts called Goosebumps.  I lined them up so that the circles would be centered in each strip.  I then applied Distress Ink in Rusty Hinge over them.  I made sure to vary the intensity of the color The next time I will probably add some pops of brown among it to, so that it looks a little more aged.  I then applied Perfect Pearls in Bronze making sure to rub it in well.  These strips were attached to a background that looks like ledger paper and came from a DCWV stack called Mod Retro.  I distressed the edges with Distress Ink in Brushed Corduroy.  The stamp for the car and sentiment came from a set called For the Guys by Unity Stamp Company. It is a new set for me but I have already used it 3 times because of the great images for guys. I stamped the car with Versamark and used a Sapphire Blue embossing powder on it.  I cut the ovals around both of the stamps with thin dies on my Cuttlebug, put Distress ink on the edges and popped the sentiment up on foam dots.  The strips have a luster to them that looks really good in person. - Denise

If you don't have Perfect Pearls, there are other ways to achieve the look, so just Google faux metal paper and see what pops up.


Wednesday, October 19, 2016

Card Sketch Wednesday #36-2016

Fun rays are featured in today's card sketch


The rays used in my card are not your typical ones


I arranged some instruments I had from the set by CTMH called Delightful Ditty around a center circle and the stamped them with Versamark a couple of times to make sure they were really wet.  Using my homemade Misti made this much easier.  I then used fine black embossing powder on the images and heated them up.  After I was done, I used Distress ink in random circular motions all over the front.  I then printed the sentiment and cut out a circle around it with my Explore since I didn't have a circle punch in the size I wanted. I went over it with the same distress ink and backed it with a slightly larger black circle to make it stand out a little more.  This was a birthday card for a man who used to play a couple of different instruments.  - Denise

The sketches are a great starting point and then you can let your imagination take over.

Tuesday, October 18, 2016

Color Challenge Tuesday #36-2016

Tuesday's color challenge-

Here is my card using these colors -


I purchased a whole stack of foil card stock in a 5 x 7 size at a great price, so I have been experimenting.  I ran the piece through my Cuttlebug using an embossing folder called Bit of Paisley.  I then used a paint brush to apply alcohol inks within the various spaces created by the embossing. I had to apply them a couple of times to get it dark enough to see.  I then took one of the purple alcohol colors and wiped that across a plain piece of the foil with an alcohol applicator.  It dries quickly and I too that piece and cut out the name of the person this card was for on my Explore.  I love to personalize cards with the names of the recipient.  I backed the foil with StickIt before I cut it out which made it easy to stick on to a plain piece of plain foil.  I then stamped the Happy Birthday positioning it between the M and d of the name.  I attached it at an angle over the embossed piece and it was done.  I hand delivered it to a member of our congregation who is 91 years young and she loved it. - Denise


Monday, October 17, 2016

Mistletoe Monday #36-2016

The challenge this Mistletoe Monday is to make a Holiday card without a sentiment on the front.


I made this card by die cutting a large snow flake on some foil cardstock I had on hand.  This was a die using my Cuttlebug and I am afraid I don't have the name of it.  I backed the cardstock with a product called StickIt before running it through my Cuttlebug.  This product is great for using on more intricate die cuts because it becomes a sticker and you don't have to use any glue.  I find it is less messy than my Xyron too.  By cutting from the middle of the piece of foil, I could use the remainder as the mat for the pearl blue cardstock on which I placed the die cut.  The smaller flakes were also punched from pieces I cut out of the middle of the foil backing.  It was a small punch that I already had on hand.  It really went together very quickly, but looks very elegant and allows me to put any sort of greeting on the inside, Christmas or just Winter.  I did find out that foil this shiny is very hard to photograph because my reflection keeps showing in it, so that is me you kind of see in the middle. - Denise

It is a great time to start those Holiday Cards.


Sunday, October 16, 2016

Clean and Simple Sunday #36-2016

Making a monochromatic card using white, cream or tan is our month long challenge for Clean & Simple Sundays.


The simplest way to make a statement with a monochromatic card is to use an embossing folder.  For this card, I used my Cuttlebug and a folder called Tropic Bloom by Cuttlebug.  I cut it just smaller than the card and popped it up with foam to give even more dimension.  The sentiment came from a stamp set called You Can and You Will by Unity Stamp Company.  These make great cards for weddings. - Denise

Try making a monochromatic card today.

Saturday, October 15, 2016

Inspiration Saturday #35-2016

When you see this picture, what comes to your mind?  


Gracie had a vision of this card-


The photo reminds me of going to Arkansas and digging for rocks, crystals, and diamonds but all we came home with were a few crystals  and  some pretty rocks - didn't  find any geodesic or diamonds!  I used a stencil and sponged Tim  Holtz  distress  inks fried brick, mustard seed, weathered woid, seedless perseveres, and black soot.  I die cut the "thanks" and the flourishes from dark yellow cs.  The card base is a deep purple.  I added a few bronze metal accents . ~ Gracie  

Tantalaya also did a Thank You card with a rich variety of colors-


This one was a challenge for me this week. I kept staring at the photo not sure where I was going to go. So I took the grey and made it the card base I then took black card stock and made it an 1/8"shorter then the A2 size card then took ome watercolor paper and distress inks and created a rainbow background. I took a page from Kristina Werner and sprayed water on it to create a great look. Finished off card with large Thanks die cut which I used the glitter brush marker from spectrum noir in clear. - Tantalaya

Let your vision of the inspiration photo guide your next card -
Denise


Friday, October 14, 2016

C.A.S.E A Card Friday #35-2016

Let's C.A.S.E. this card -


Tanatalaya uses a lot of dimension for a perfect C.A.S.E. of the example card.


For this C.A.S.E. card I decided to change the color of the card and to change the flowers that was used on the front. And although I did use splatters and the layout I was truly inspire but the card we had this week. I finished my card off with droplets of the glitter nuvo in sherbert shimmer.- Tantalaya.

Gracie also went with dimension on her lovely card-


I love this card!  I started with white cs and spritzed it with Amethyst Ritzy  Ditzy  Glitz  spray then dropped some on the card for some more color.  The stamped flowers are from Tuesday  Technique  "Gallia Rose".  I colored the roses using Spectrum  Noir  markers  then fussy cut them ( why I don't know - I forgot I have the matching die cut!)  The "thanks" is cut with purple glitter paper from Recollections.  One flower is attached  with  pop dots and the card base is lavender  cs. ~ Gracie 

Add some dimension to your next card and you will love the results - Denise